 352-804-2056

The Décor Edit
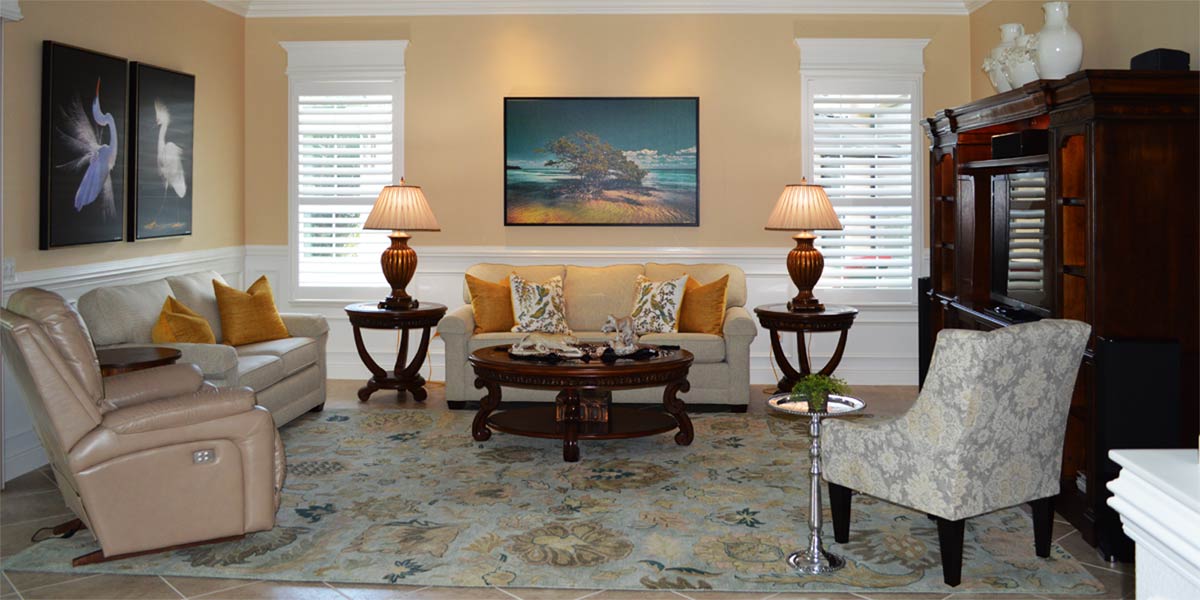
When I first started my decorating business in 2011, I used only what people had in their homes to decorate. We would move the furniture around applying six design principles to the space and what was old would look new again. The process is similar to editing words of a writer. You find out what works best and conveys the clearest message and edit out the rest. The truth is you don’t have to buy new furniture to have an amazing space. If you just use what you already own, the space can be amazing and it will reflect your personality because you purchased all the items in the space. No matter what kind of furniture you own, the room comes together with proper placement of the furniture which is the basic building block of any room edit. Let’s take a look at the living room of a Gardenia model that found new life from a simple décor edit and most of all is a true reflection of the homeowner’s bright and happy personality somewhere in the heart of The Villages.
• Clear the room
The first thing you must do to perform a décor edit is to clear the room.
The room must have everything moved out of the space so that we can see the space and assess a new furniture layout. A blank space is like a fresh canvas that is clean and uncluttered.
• First Step Establish a focal point
In the Gardenia model I rarely place the entertainment unit on the wall between the windows but we decided that the wall between the windows would be great for the entertainment unit in this space because it is white. The two windows on each side of the entertainment unit bring light into the space but if the furniture is dark between the windows the eye will interpret the dark piece as darker than in reality. The white entertainment unit does not darken because it is white. So, for this room we chose to place the entertainment unit between the windows and it looks fantastic.
• The second step is to Re-Arrange the furniture
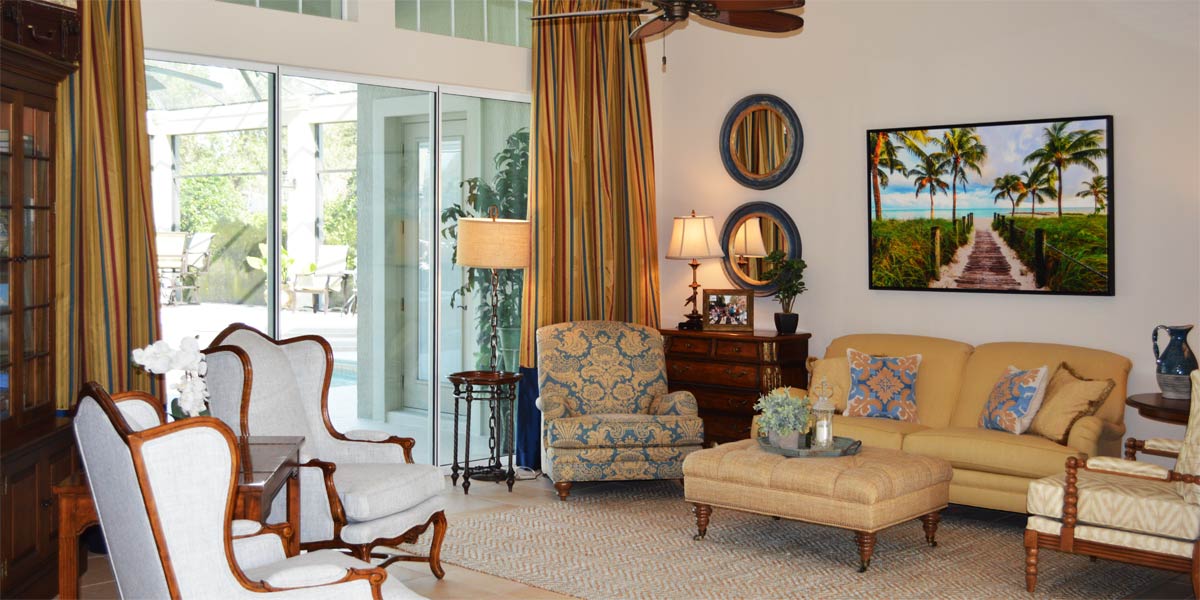
This room is not a TV watching room so we did not have to place any furniture straight on to the TV. We were more interested in setting up the room for socializing. The large couch was moved to sit straight on the lanai wall that is part sliding glass door. It is perfectly fine that the wall is part sliding glass door. We placed the rocker at a slight angle into the room so that if someone wanted to use it for TV they could or it is a great chair for conversation. Finally, we placed two very comfortable rattan wing back chairs together on the wall opposite the couch. I love the light brown color and the white together it looks fresh. The room looks inviting and easy to access for relaxing.
• The third step is to place the accessory tables
Now that the major furniture is in place the room becomes a jig saw puzzle that can be put together. The key to this step is to listen to what the room needs verses what you want to put in the room. At this point the room wanted a side table on each side of the couch. The homeowner had purchased two antique children’s desks that worked great as an unexpected touch of whimsy in the space. The desks were finished in a similar light brown and they visually tied into the other furniture in the space. The two rattan wingback chairs received a side table made of wicker and wood that we found in another room in the house. Finally, we placed the large coffee table in front of the sofa with no more than twenty five inches between the sofa and the coffee table. The coffee table should be kept closer because people on the sofa have to be able to reach the coffee table. The twenty five inches is the standard because the human body needs at a minimum twenty five inches of width to move through a space.
• The fourth step is to place lamps
Now that we have side tables in place we can install the lighting. The homeowner had three lamps in the space and we re-used two of the lamps. The lamp by the sofa has a vintage look with a blue shade and it looked very at home by the blue sofa. The second lamp was placed between the two wicker wingback chairs.
• The fifth step is to hang artwork
We hang artwork after the lighting because the lamp height can change the position of a picture. The key to hanging art from a collection of things that the homeowners love is to find relationships in color. We had two pictures that did have a coastal subject matter and they had a color relationship so we decided to use them on the wall behind the sofa. The large picture was hung about two inches over the light switch and the smaller picture was hung asymmetrically beside the large picture. The artwork pops on the wall and invites you in to experience the space. The mirror that used to hang on the wall behind the sofa was moved to hang on the wall opposite the sofa. The mirror tied into the color of the chair cushions on the wicker wingbacks and on this wall it can reflect light from the sliding glass door into the space.
• The final step is to accessorize
The entertainment unit received a collection of all the pieces of memorabilia from the homeowner’s travels. Also, we placed a few glass clowns with lots of color in the entertainment unit because the homeowner is a clown and performs at clowning events. The coffee table received a bowl of shells for texture along with several books from their travels. Also, we used an antique box to hold a large collectible shell that would serve as a conversation piece on the table.
• One new thing
The only new thing in the space was two 5×7 rugs. We needed a rug but the homeowners were concerned about their aging dog having accidents on an expensive new rug. The homeowner purchased two solid indigo blue indoor outdoor rugs which we laid together seam to seam to create one big rug. Now the room looks finished and the rug will be easy to clean.
Call Ruth your full service decorator at: 352-804-2056 or Contact Us
Before and After Pics Below

