 352-804-2056

Cruising Kitchen
Though we are free to roam about Florida during this Covid season we are not free to cruise. Since we are not cruising we are at home and when we are at home we look at things. We watch HGTV and we look at our house and wonder what we could do to make the house look better. A new sofa, rug or lamps is a quick and easy way to refresh a space but what if you were going on a month long cruise and did not get to go? What do you think you could get for that money? Well, let me show you! Let’s see how these homeowners of a Gardenia model cruised into a new kitchen rather than into New Zealand, somewhere in the heart of The Villages.
• Wall paint and cabinet color 
The kitchen in the before picture has dark green walls and maple cabinets. The walls were too dark and outdated to stay green so we painted them in a creamy yellow color. The color is one that I mixed myself from several different colors so it does not have a name. Maple cabinets are great but over time they can fade. These cabinets were showing their age from use and they were fading making them look uneven in color.
• Planning
When planning the new kitchen the homeowners wanted a pull out trash bin rather than placing a trash can under the sink. If you have this issue but no place to put the pull out you can consider what this homeowners did to solve the problem. Since the counter tops were being replaced the homeowners would need a new sink. They were advised to buy a large single sink with the drain to the one side. By placing the drain on one side the plumbing can be moved so the trash compacter and drain all run through the same opening. This allows one side under the sink to be free for a pullout trash can. This little trick yields big rewards!
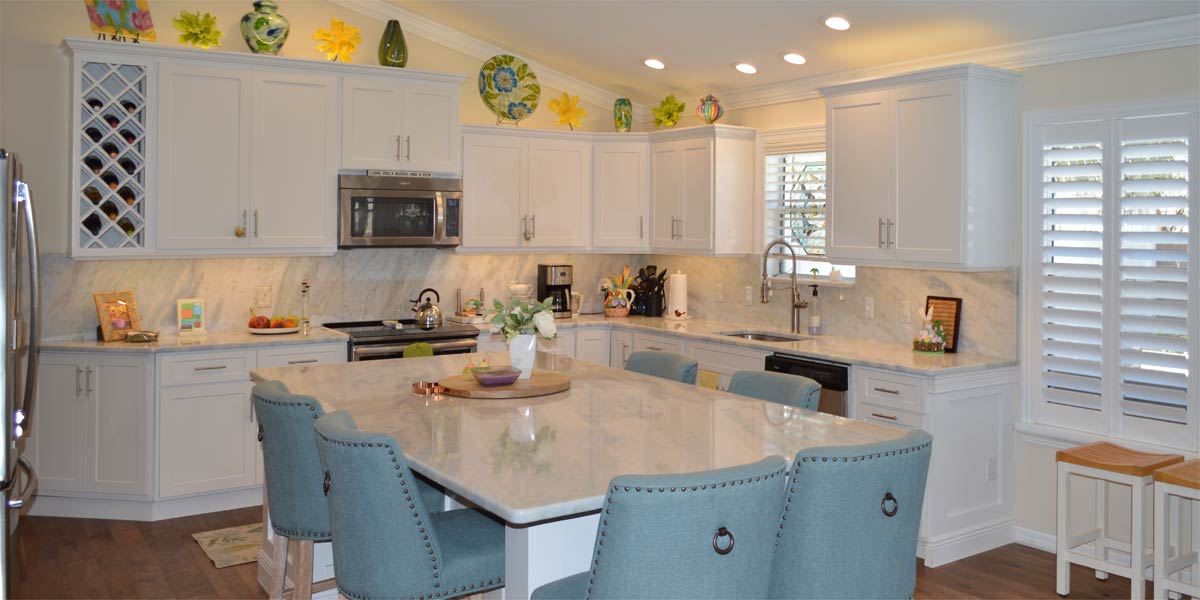
• White cabinets
The homeowner always wanted to have white cabinets in this space and she got them. Since this house was older the point was to update the space and create a look that would be timeless. The white doors and white cabinets show well and will not go out of style…..ever! The main request that I receive is to make the space light bright and airy.
• New additions
We added a large box above the microwave to stagger the cabinets for a modern look and to add interest. We did not want to increase the height of all the cabinets so we chose two. Also, the cabinet above the refrigerator is taller and deeper. This application above the refrigerator helps to balance out the size of the large appliance.
• Granite
The homeowners chose new light white and tan color granite. The granite was also used as a backsplash. I like to use the granite as a backsplash because it is installed the same day as the counter tops. When granite is the backsplash we use all the slabs purchased with little waste and there is no grout to worry about cleaning!
• Island
The homeowner had a rolling island that they used for years but it was purchased online and did not match the new cabinetry. We had the cabinet maker create a new island for the space. The island is not attached to the floor but looks as if it is stationary. It could be moved if needed but it is heavy with the granite so it will stay put most of the time. In a Gardenia if you don’t have an island consider it because it comes in handy so often all my customers report!
• Appliances
The homeowner did purchase new appliances in stainless steel. Stainless steel is one of those trends that became a classic! Though stainless steel is silver it is reflective and maintains a certain amount of neutrality in the kitchen making it something that will stand the test of time. Also, it is very important to know the size of your new appliances before your new kitchen is installed. I don’t like to go by standard openings because you may find something that is not standard that you must have. So plan ahead and try to pick appliances before your kitchen is installed.
• Molding
We added molding to side of all cabinets that did not have a door. In an upgraded kitchen these details matter. The sides of the cabinets coordinate with the look of the door and provide a fully finished look.
• Wainscot
We added white boxes of wainscot under the bar. Sometimes bead board can be added into the inside of the box but this homeowner chose a plain wood that looks very nice too. The wainscot visually ties the bar area to the kitchen so that when you look into the kitchen everything is cohesive. This looks better than wall color under the bar because the white look of the wainscot does provide neutrality and visual cohesion with the white cabinets of the kitchen.
• New accessories and art
We added fresh new accessories above the cabinets and the space came to life!
Don’t forget that in a Gardenia and all models like them that art above the cabinets displays nicely!
P.S. –Attention all club presidents! We give free decorating seminars. It is lots of fun and very informative. Call and schedule your club today. Also, we are on-line check out our web-site at www.ruthdyer.com and you can always e-mail us at ruth@finishingtouchfl.com or Call Ruth your full service decorator at 352-804-2056.
Before and After Pics Below

