 352-804-2056

See your space through new eyes
We all see the world through different lenses. Some people have rosy lenses, some have cloudy lenses, and we all know someone who sees the world through dark lenses. The lens through which you see the world affects everything in our life including our home and how you see it. The objects in your home have attached meaning and memories and those things go into the decisions we make when it comes to where that furniture will live in our home. The personal biases we have toward our own things cloud our judgement about what can or cannot be changed in a space that we occupy. A different set of lenses with unbiased ideas about your things is what is often needed to make a space fresh using only what you already own. In this room we are seeing today, my lenses saw the things only for their decorative value which gave my helper and I the freedom to apply pure design theory to the space and achieve our goal. Let’s peek into this twenty-year-old willow model to see how the space transformed using what the homeowner already owned, a house full of memories and fun somewhere in the heart of The Villages.
• Create a focal wall
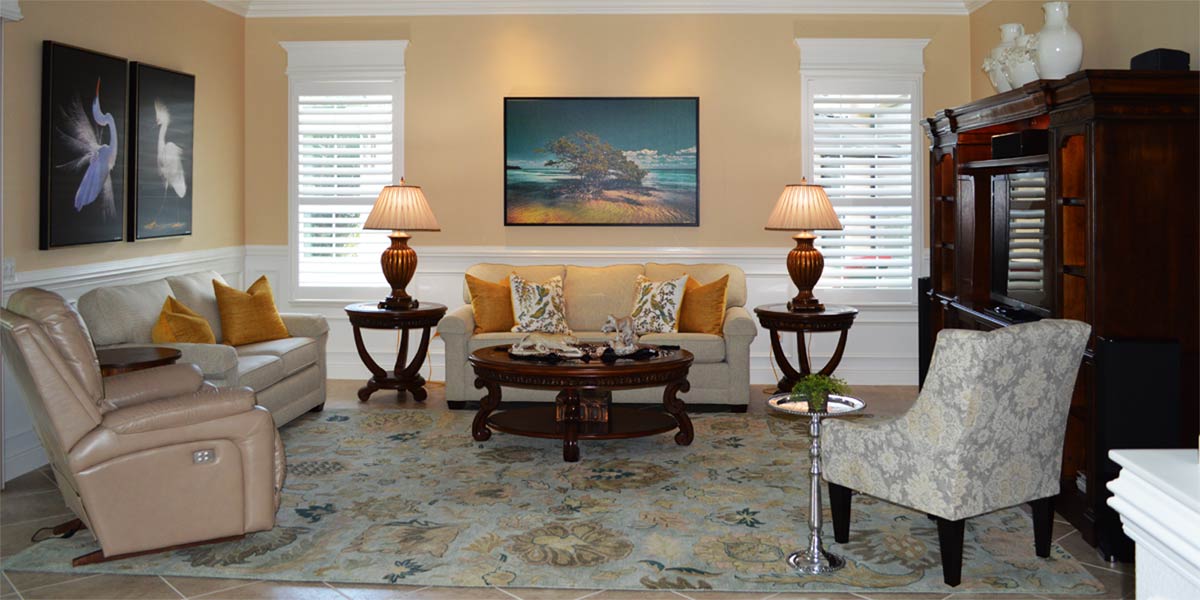
This room has a very large wall that is shared with the dining room and another large wall with an opening to the master bedroom. The sliding glass door leads out to the lanai closest to the wall that has the opening to the master bedroom. Typically, we would make the largest wall the focal point but in this case since the slider opens by the wall with the opening to the master bedroom, that wall will remain the focal point. We kept the TV on that wall, but we chose a different table to use for the TV. Originally twenty years ago the homeowners purchased an armoire to house the TV but as time moved on televisions became larger and flatter. When the new TV came into the space the armoire was moved to the wall opposite the dining room. The armoire loomed large now as you walked into the space. The new flat TV received a console to hold it and its components. Now the focal wall had a sofa table, a console, and a chair lined up so that there was no real delineation that this was the focal point in the space. We took out the low TV console and moved the sofa table to the center of the wall to become the TV stand. Many people would not think of this because it is a sofa table and a bit higher than a TV console, but the extra height works great for TV watching. This sofa table did have big open spaces between the top and the bottom which would allow us to see the cords that we all hate, but we filled the bottom of the sofa table with tall, large baskets so the space is full, and we cannot see the cords. That open space in design is called negative space and it leaves room for clutter but if you fill it with something large it will not look cluttered.
• Re-arrange seating pieces
Re-arranging the furniture is the next most important step. We re-homed the large dark recliner to another part of the house and moved the smaller lighter recliner forward into the space so that it would now live on the right side of the sofa angled inward towards the view and the TV. The small recliner looked much smaller at the back of the room because it was seen relation to the height of the sofa and the eye would move down at the back of the space. Now in its new position the recliner is seen in addition to the sofa and the difference in height between the two is not noticed because the line of movement is up. This is very important to start with the short furniture in the front of the room and move the larger seating pieces deeper into the space. We moved the curved conversational sofa deep into the space and angled it with the corner of the wall. This allowed the curve of the sofa to work in the room by running in front of the large window and along part of the wall. Not only did the sofa look like it now fit the space, but it looked smaller and very inviting.
• Bring out one more chair
The focal wall had the sofa table, the TV and one large chair that we moved deeper into the space near the slider. Moving the chair left a space that needed a chair but not a big chair. We found a chair in the master bedroom that was perfect! We brought it out and placed it on the other side of the TV and sofa table. The focal wall now had two chairs and a nice sofa table with a TV. The balance was coming into view. So now, the room has three places to sit on the sofa and one recliner for the homeowner, as well as two seating pieces on each side of the TV and it looks open and inviting.
• Placement of side tables and such
We were able to place a nice big side table with open shelves between the recliner and the sofa so that the homeowner could place all the things one would need for the control station of the home. We found a small table to place beside the other arm of the sofa in one of the bedrooms and it looked great. Now, are you wondering what did we do with the armoire?
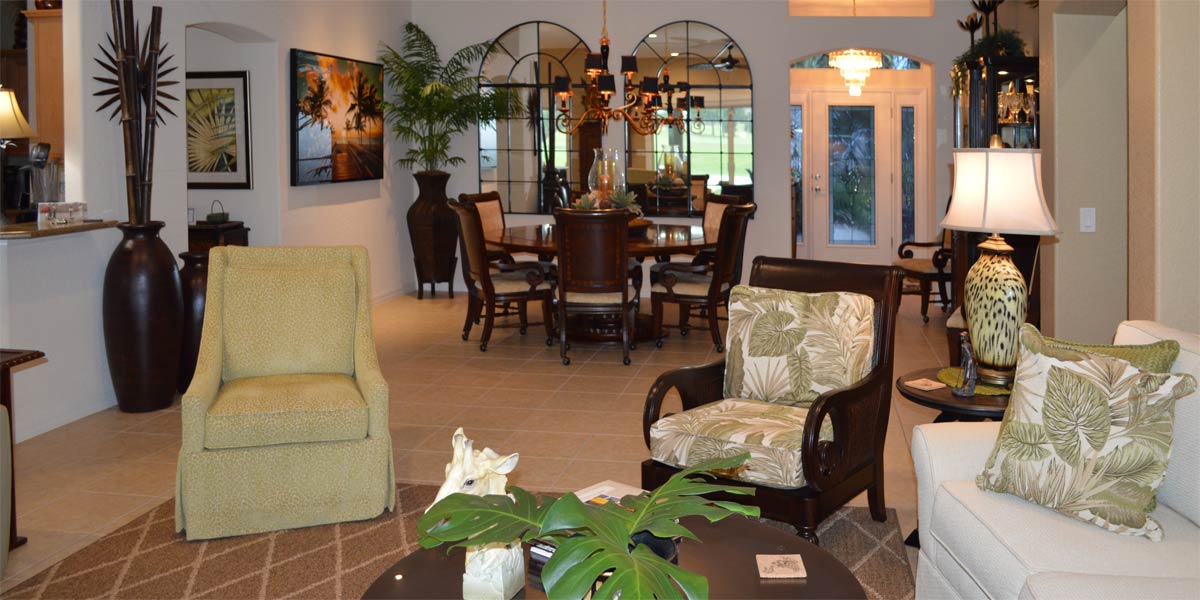
Well, we kept it! We moved it into the dining room. This model is known for having a tight dining space and everyone uses the chandelier as their guide for the table. We could not!
We raised the chandelier by hooking it up high and pulled the table out into the space just a bit. We moved the small buffet that was in the dining room to the wall that was the home of the armoire, and we moved the armoire to the wall that held the buffet. The switch was perfect. It allowed the armoire to be placed on a wall that was out of the way and the wall minimized the size of the armoire. Moving the buffet allowed the space to have an entry way that was inviting and light.
• Lighting
We use lamps that the homeowner owned. The chandelier will be removed and replaced with an integrated light that is flat to the ceiling. There will be no need to worry about table placement when we don’t have to worry about a chandelier.
• Hang Art
We re-hung art that the homeowner had to enhance our furniture placement.
Call Ruth your full service decorator at: 352-804-2056
or Contact Us
Before and After Pics Below


